I am always loosing my tools in the yard and around the house depending on the craft I am into. With a little searching I have found a few ideas on how to make your own garden apron. I really like the idea of making my own so that I can personalize it the way I like. I can add extra pockets and most important I can pick my fabric.
The type of fabric you choose can really express who you are and make it your personal apron or for the men it can be a man belt.
You will need:
Heavy fabric: You can get creative and pick different patterns for the pockets. The back can be plain unless you want it to be reversable.
I have seen other aprons made out of an old pair of jeans.
If you choose to use jeans then most of your pockets are done for you.
Below is an estimate of the cuts of fabric you will need.
This is for a size Large in womans. If you are making one for the man in your life you may need to add more fabric for each piece.


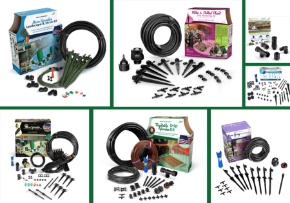
I found the images above on google images. I thought these were neat examples of DIY garden aprons as well.
Size
- 1 – 20” x 14 back piece
- 1 – 23” x 10” apron pockets
- 1 – 62” x 4” waist band/apron strings
Front
1. face your front piece and back piece towards each other. You will be sewind the two short ends together as well as the bottom. leave 1 1/2 ince of te side fabric unstiched and open.
You will be ataching the apron strings between these open pieces before sewing them up.
Pockets
2. you have a few choices for the pockets. If you are looking for a rustic look you can pin the fabric down for the pockets without tucking in the deges first. you will sew them on in the desired spot leaving 1/2 inch all the way around. Once you wash the apron the outer edges of the pockets will frey and give you a rustic looking garden apron. The 2nd choice is to fold the edges in and press with the iron to get them to lay smooth. Next you will pin in place and sew.
3. waist band
note for later: (This can be trickey to flip once done. If you sew a string to one end of the fabric as long as the apron string you can easily pull the string to turn the fabric inside right. If you don't use the string it will just take a little longer to turn it inside right.)
You are going to fold the waist band/apron string over hot dog style. The nice side that you want to see later will be folded in. Next you need to pin the long open end together iron if needed and then sew it all the way across and sew up one end. ( If you used the string idea you will want to sew up the end with the string attached). once done you will want to Turn the long piece inside right. This is where you can use the string to pull it through. Once it is fliped you can cut the string off.
4. Attach waist band
Now you can attach the band to the open flaps of the main apron. You will want to measure to make sure you leave an even amount on both sides to tie. Fold the open part over and sink the apron band between the two folded open pieces of fabric. Once in place pin down, iron and sew up.
5. You will want to tuck and sew the open end of the apron as well.
Now it is time to enjoy your personal garden apron.
www.misterlandscaper.com