Search
RSS

Blog posts tagged with '#DIY'

DIY Fairy Garden

Are you looking for something new to do with the kids or grandkids?

Want to get them outdoors and away from the technology?      

Here is an adorable craft to decorate the garden with the kids help!


What you will need:

  1.        Large Flower pot
  2.        Soil
  3.        Your choice of plants/ flowers
  4.        Twigs of several sizes
  5.        Plastic Cup or Bottle
  6.        Decorative Rocks
  7.        Hot glue gun
  8.        Twine


Step 1: Take your twigs and create some fairy furniture! 

Step 2: Take your plastic cup or bottle and glue your decorative rocks on to create a fairy home.

Step 4: Set your decorations and home aside and fill your flower pot with soil. (You want it to be as full as possible without overflowing.) Add your plants. (For our fairy garden that we are keeping indoors we chose to use fake moss and plastic flowers.)

Step 5: Add your fairy decorations to the flower pot! 

Enjoy this fun project!

Happy Gardening!


Images curtesy of Pinterest. 

Butterfly Feeder

 Are you missing the butterflies in your garden?

With this easy DIY craft you will soon be able to enjoy watching butterflies flutter from flower to flower.

You will need:

1. Mason jar

2. lid

3. small sponge

4. strong string

5. sauce pan

6. sugar

7. bright craft paint

8. garden stickers

9. hammer

10. 1 nail

You will want to start by tapping a small hole through the top of your mason jar lid. Next you will cut off a piece of the kitchen sponge and wedge it into the hole. This is where your butterfly will feed.  Next you will want to test your jar to make sure the liquid does not leak out. For now you can add water and turn the jar upside down to make sure it does not leak. Next you can add the string  that your feeder will hang from. You will need 1 long piece about 6  feet long. this will wrap around your jar near the lid as well as secure the other 2 pieces that will be used to support the sides of the feeder as it sits upside down. Tie the 6 foot string around the ring of the jar so you have an even amount on both sides.

Make sure it is nice and tight. Now you are going to tie 1 end of the 2 foot string to one side of the string wrapped around the jar. Next you are going to tie the opposite end of the 2 foot string to the other side of the jar. This will make a loop over your feeder. Next you want to do the same thing with the other 2 foot string. This time you are going to secure it to the opposite side of where the other 2 foot strings are attached. When you are done you should have 2 secure loops that support the jar evenly on all 4 sides. Now you will need to decorate

your jar so that it will attract the butterflies as well as humming birds. You will want to use bright colors and flower stickers for this.  Finally you will need to make the butterfly food. boil 4 cups water to 1 tablespoon sugar on the stove until sugar is dissolved. Don't use too much sugar it can hurt the butterfly.

Allow time to cool and then add the food to the jar. Secure the lid and hang about 3-4 feet above flowers so the butterflies can flind it. Now its time to sit back and enjoy your new garden friends.


Wind Chimes

 The sound of a wind chime on a cool fall night can be music to the ear.

If you are looking for  a nice and easy DIY garden craft that will continue to give the gift of a beautiful sound then you might want to creat a wind chime.

You can make a wind chime out of just about anything that makes a sound when it bumps into each other.


Different objects make different sounds so you might want to try a few sounds before you beging to create your wind chime.

Materials you may need:

strong string or thin roap

nice thick stick about 6 inches long.

screw driver

small saw

heavy fishing line or thin wire

sand paper

glue

glass beads

cans

paint

old fancy keys

shells

rocks

metal bottle caps

glass

bailing wire

metal pieces

and so on...

This craft leaves a lot of room for creativity. It just depends on the style and sound you are looking for.


There are many neat ideas. If you go to google images and search wind chimes you will see many great ideas.

Epsom Salt for The Garden

My upper back was extremely achy this week. I decided to get a massage. What a GREAT idea! I felt a lot better. The massage therapist suggested I go home and take a bath in Epsom Salt. She informed me that it helps take the toxins out of your body. I took her advice and soaked for 20 min. I felt even better and I did not notice the tenderness she warned me about following a deep tissue massage.

I decided to do a little digging and found that Epsom salt is good for lots of things including our GARDEN! Epsom salt Deters pest away, grows more flowers and helps your garden grow bigger than ever before.

To make your homemade fertilizer for the garden Dissolve 1 Tbs Epson salt in 1 gallon of water. Water your plants with this solution once a month. It works for house plants as well.

Epsom salt is not salt. It is a mineral that most soil is lacking. Enjoy watching your garden thrive! 

Cake Pan Stepping Stone

 Don't settle for the same old stepping stones you find at your local hardware store.

Make it your own by adding your personal touch. Is all you need is a  cake pan, contact paper, ready mix concrete, rubber gloves, Vaseline, chicken wire, sponge, bucket, varnish and your personal selection of marbles, glass, rocks and anything else you might like to add. You can also make new pieces by breaking up old china or glass.

Be sure to use protective gloves and eye ware before you start hammering.   Now you will need to rub the inside of your cake pan down with Vaseline to prevent the cement from sticking.

Next you cut out the contact paper into the shape and size of your cake pan. Place the contact paper in the bottom of the cake pan with the sticky side up. Place your rocks, glass and marbles onto the contact paper face down creating your own personal design. Now you are ready to mix your concrete. find an old bucket and pour enough concrete into the bucket to fill your cake pan.

Next you need to slowly add water and stir the concrete with a long spoon until it is the consistency of cake batter.

Do not get the concrete on your skin. If it does get on your skin wash it off right away. If you leave it on your skin it will start to burn. Fill the cement to the top of the cake pan. Now place a square or circle piece of chicken wire into the cement and press it about half way down.

Don't cut the wire too big or it will be sticking out the sides of your stepping stone.


Allow the cement to harden then you are ready to remove your personal stepping stone.

You can use a sponge to clean your stone and use the extra cement to fill in any air bubbles. Finally you can varnish your stone to keep it nice and shiny.

Garden Path

Looking at all the DIY creative garden paths on our Facebook page has inspired me to give it a try. 

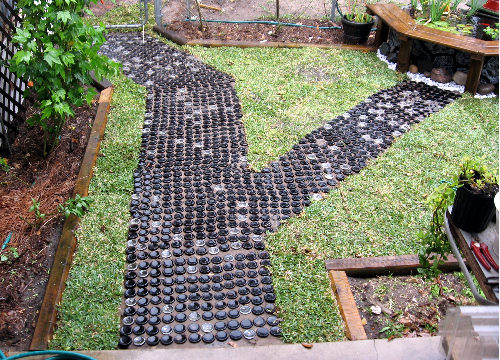
I have seen many beautiful DIY walk ways made out of a collection of rocks, broken concrete, marbles, and more! My first step is to start collecting my creative materials.

With a little searching I have found directions on how to put in my own garden path. I also watch a lot of DIY network.

They are always tearing up back yards and laying walk ways.

I have been on Craigs List a lot! If you go under the free section you might get lucky. I see a lot of free broken up concrete.

The trick to this is you want one side to be flat so that it is easy to lay.

I have also thought about using the following:

golf balls, river rocks, glass bottle

bottoms (bottoms facing up and tops cemented down

(be very careful not to cut yourself!)), sliced treated tree stumps, or old plates.

The list is just my thoughts as well as some of the ideas I came across on Facebook and Pintrest.

Making your own DIY  garden path can be really fun!

Get your kids involved and have them help you.

The idea is to get creative and make it personal.  


Going Natural


Going Natural

Using all natural materials in the yard and around the home is a great idea. All natural materials are safer for your family as well. I recently discovered tha you can usev that as your pets. The next time you walk around the corner into the kitchen and realize your child or pet has discovered the cleaning bottle on the counter and managed to get it down you won't have to panic.

There are many ways to make all natural cleaning supplies right in your own home. My new favorite is 1 cup boiling white vinegar mixed with 1 cup dish soap. Dump it in a spray bottle and use it to clean counters, stove, floors bathroom, and much more.

Weed Killer

If you are trying to get rid of the weeds in your yard mix 4 cups vinegar,  1/4 cup salt and 2 tsp. soap.

If you have a lot of weeds you can mix 1 gallon vinegar, 1 cup salt, and  1/4 cup soap.


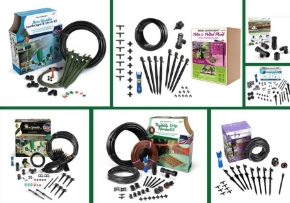
The New Micro Spray Pot Kit

 Are you looking for a low-flow irrigation kit that will water all your potted plants?

Mister Landscaper has designed a great new DIY low-flow irrigation kit.  

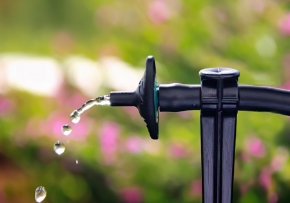
The Micro Spray Pot Stake Kit comes with 8 Adjustable Down-Spray Pot Stakes.


This complete DIY kit is easy to install and comes with every thing you need.  

Your potted plants will be getting the perfect amount of water in 6 easy steps.

This kit is expandable!  You can add up to 65 Pot Stakes.

Go to:  www.misterlandscaper.com and click on the new product link for more information.


Proudly Made In The USA.


Mister Landscapers Timer

The Mister Landscaper Timer can be set to give all your plants the perfect amount of water at the best time of day. The best part is that you don't have to be home to water. The timer can be set to turn on and off while you are away from home. You don't have to worry about paying someone to water your plants while you are away. The Mister Landscaper can water all your plants for you.


Save Money by Harvesting Seeds

Harvesting your own seeds is a great way to save money and get a lot more for your buck. You can save money by collecting the seeds off your existing plants. You could also ask your friends or family after the summer has passed and everything is dieing off or going to sleep.

Once you have your seeds just store them in a dry safe place till you are ready to plant. You can Google how to store them and the best time to start growing your seeds. You want to plant them at the right time. If you start too early the plant may start to grow out of it's container before it's time to transplant it into the ground.

Another great way to save money is to recycle the containers you usually throw out. I just washed out my roasted turkey container I bought from the grocery store. It has a black bottom and a plastic clear cap. I am going to place some rocks in the bottom and  place some soil on top of the rocks. Then I am going to  poke holes in the clear lid. This is going to make the perfect container to start growing my flowers and vegetables.

By harvesting my own seeds and planting them in a recycled mini green house I can afford to grow a lot more plants. Gardening does not have to cost a lot of money. Save your seeds and recycle your containers.