Search
RSS

Blog posts tagged with '#forthegarden'

Conserve Water This Summer

Are you looking for ways to conserve water?

The hot summer months are near.

Warm weather usually is a recipe for more water usage.

People are washing cars, filling pools, watering gardens and more.


Conserving water has been best practice in most regions.


Conserving water can not only reduce pollution in lakes and streems,

it can also save you money on your utility bill.

Below you will find a few ways to help you conserve water.

  1. Put a layer of multch around trees and plants.

    • This slows evaporation of moisture.
  2. Water your garden only when it needs it.

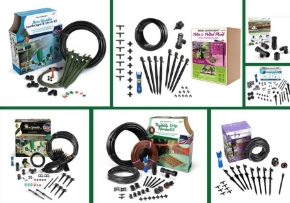
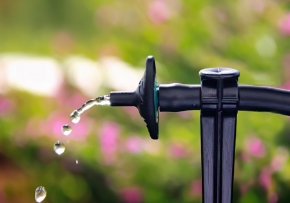
    • Mister Landscaper's DIY Low-Flow Irrigation  for the garden and potted plants can help with this. 
    • Mister Landscaper also sells a timer so you can control when your garden is watered while you are away.
  1. don't run the hose while washing your car.

  2. Water your garden in the morning. 
    • This reduces evaporation and prevents fungus from growing.
  3. Use a broom not a hose to clean the driveway.

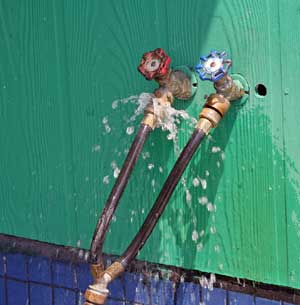
  4. Check for leaks in hoses and pipes.

    • A leaking faucet can loss 20 gallons of water a day.
  5. Use a water meter to check for hidden leaks.

    • Read the meeter two hours before and after water usage.
  6. Put water boosters in the back of your toilet.

    • Use a small bottle with rocks in it to save 10 or more gallons a day. Keep bottle away from operating tools.


Straw Bale Garden

Have you ever wondered if soil is the only way to grow a garden? Believe it or not you have other options. Today I am going to share with you how to create your own Straw Bale Garden.
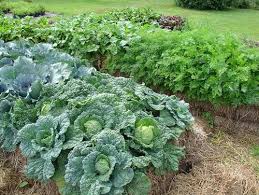
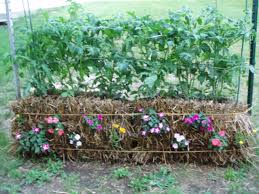
 

Straw Bail Garden's are  great for planting in small areas or areas that don't  have soil. You will need to prep your Straw Bale Garden. The good news is that it will only take 12-14 days to prepare.

The great news is that if you use Mister Landscaper's DIY Irrigation you won't have to worry about most of the prep work. The first move is to purchase your straw bales and liquid fertilizer, with nitrogen to to increase the decomposition process. The total process takes 10-12 days. 

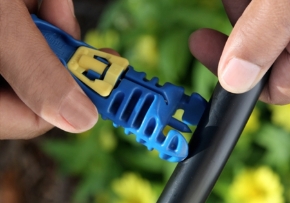
Before you set up your Mister Landscaper DIY Irrigation Kit you want to make sure your straw bale is on it's side with the cut side up. The cut side of the straw bale will act like little straws. This allows the water and fertilizer to soak down into the bale.  Now you are ready to set up Mister Landscaper's DIY Low-Flow Irrigation Kit. This only takes about 20 minutes or less. 

If you order  Mister Landscaper's Timer you can attach it to the end of your hose and you won't  have to water your bales for the next 3-4 days. You will want to set the timer to water often so that it remains damp for the entire three days. On the third day you will start using the liquid fertilizer. For the next 7-8 days you will want to use the liquid fertilizer. in addition to watering.

On day 12 you will want to return to just watering your bale. On the 12 day you will be able to stick your hand down into the bale and feel the heat from the decomposing process.

You don't want to plant until that tempature reaches the same temperature as the outside air.
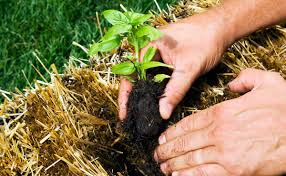
If you plant too soon you will cook your plants. On the TH day you will need to start using the liquid fertilizer. Once the temparture reaches the air temperature it's time to plant.

You can plant anything in your Straw Bale Garden although some plants can pose a challenge. For example, corn and tomatoes grow tall and may cause your bale to tip.
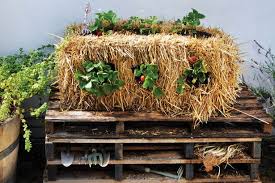
Potatoes grow down and it may be difficult to retrieve them. To plant you will plant the same way you plant in the soil. You want to dig out a hole as deep as your plants root.

Be sure to space your plants according to the directions on the plant. Add some soil around the plant to stabiles it then place the straw you removed from the hole on top of that..


Finally you are ready to sit back and watch your plants grow. Don't forget to fertilize the plants once every week or two. Mister Landscaper's DIY Irrigation will take care of the watering.


The Fall Garden


The cooler air is on its way. The tips of our corn stocks are golden brown and almost ready for harvest time. A new season is upon us. Our gardens have a few vacancy

and you ask yourself, " what can I plant during the fall season?"

The first thing you need to know is  the average time the first frost will strike in your area. Next you need to know how long your garden plant needs to grow before it is ready to pick.

Some garden vegetables tend to grow better during the cooler months of summer and into the fall months. Broccoli lovers are in luck. On average broccoli takes about 70 days to mature. Brussels Sprouts take 90 days,

Cabbage takes 70 days, Cauliflower takes about 60 days, Lettuce takes about 60 days, Radish takes about 50 days, Rutabaga will take about 90 days, and Spinach will mature in about 45 days.

Depending on what you want to plant each garden vegetable requires some tender loving care. It is best to talk to your local nursery about how to grow your vegetables successfully in your area.

Wishing all my garden friends a happy fall harvest!

Sincerely,

Mister Landscaper


Protect Your Seedlings


It's the time of year where you work so hard to getting your garden planted. The rewards are great as long as you can protect your plants from the last frost, and pests!


The scare crow is a good idea in some cases for example keeping the curious three year old out, but it does not always work.


I came across a cheap DIY idea that may help some of you protect your seedlings. It might not work for all of us, but it is very inexpensive! It may be worth giving it a try. 


Just cut off the bottom of your jug/plastic container and place it over your seedling. The jug will protect your smaller plants from frost, birds and other small creatures.


Protecting you seedlings now will be very rewarding in the near future.

Save Water


Spring is in the air and soon it will be summer! This is the time of year when we get outside and turn on the water. We fill the pool, clean the house, wash the car, and water the flowers. A lot of water will be flowing come spring and summer. This means a hike in your water bill and for some a water crisis.


Mister Landscaper has worked very hard through the years to help families save water. We all love the beautiful flowers growing in our gardens and the fresh fruit, and vegetables. Mister Landscaper understands the importance of gardening.


They also understand that conserving water is very important. This is why they decided to expand their low-flow irrigation system business and offer it to the public. They have developed DIY low-flow irrigation kits that are high quality and very easy to install. Everything you need comes in one kit.


If you ever decide you want to expand the low-flow irrigation system they sell the expansion parts separately as well. The family behind Mister Landscaper also strive to satisfy every customer. If you have questions we are here to help you. 

Garden Toys


We are never too old to play with Tonka trucks!

Our garden friends have done it again! They have come up with great ideas for re-purposing old toys. Don't toss out the old Tonka truck put it to good use

again by planting flowers in the back. These old toys make a great decorative conversation piece to any garden.

If you don't have a Tonka truck  use what ever you can find. The choices are endless when it comes to old toys. Check out your thrift stores and garage sales for more inspirational ideas. 

Check out our Pintrest page for more great DIY garden ideas.

Don't Lose It Use It!

It's that time of year again where you put on the garden gloves and start planting. It's so exciting sometimes you can forget what you just put in the ground.

This could leave you guessing all summer long. No worries. I have found the solution! It's an easy DIY craft that will take all the guessing out of gardening.

There are many easy ways to mark your seeds! You can keep it simple or get creative. My favorite is using old tea spoons with a picture of what you planted glued to the spoon.

The options are endless. For this one you will need


Materials Needed:

outdoor Mod Podge

Permanente markers

heave construction paper

ice tea spoons (check thrift stores or ebay)

acrylic spray coating

scissors


For this DIY craft you might want to ask the kids to help with coloring a small picture of the vegetable you are going to plant using the permanent markers. Make sure to cut out the paper the size of the spoon before you color the picture. This way you know it will fit on the spoon.

You will also want to put a small cut on one side of your circle to help it lay flat  on the spoon. Next put the outdoor Mod Podge on the back of your picture with a paint brush or Q-tip.

Then stick the picture to the inside of the spoon and press it down till you get it just right. This might take a minute.

Once the picture is in place cover the top of the picture with the outdoor Mod Podge. Give it time to dry. This will take about 20 minutes.

Next you want to seal it with the Acrylic spray. This will keep it safe from the rain and sprinklers. Now you are ready to start planting.

Remember don't lose it Use it. :)

Check Out These Other Great Ideas!

Check out our Pintrest page for more great DIY garden ideas!

Bird Cage Garden

This DIY craft will have your garden friends turning their heads for a second look. 

Be on the look out for bird cages the next time you stop at a local garage sale or flea market. With a little paint and some nice flowers you  can make an old bird cage  beautiful!

You will need:

1. bird cage

2. small chain to hand the cage

3. spray paint to paint the bird cage (you pick the color)

4. sand paper to lightly sand the bird cage prior to spray painting if needed.

5. flowers or greenery of your choice


 Once you have found a bird cage you like you will be well on your way to enjoying the beautiful new addition to your garden with just a few easy steps. First you will need to decide if you want to paint it or leave it the origional color. If  you decide to paint you will need to clean the bird cage and lightly sand it.

Next find a well ventelated area outside and spray paint the cage. Follow the directions on the can. Allow the bird cage to dry and then prepare to plant your flowers inside the cage.

You can use the tray that came with the cage as long as you place holes in the bottom as well as small rocks prior to adding your dirt and flowers. If the bottom of the cage does not have a solid bottom you can use a flower pot or another container that fits. Once you have planted your flowers you are ready to hang your new DIY garden craft.

If you are looking for an easy way to irrigate  your new birdcage garden check out www.misterlandscaper.com  for some great high quality  DIY low-flow drip irrigation solutions.


DIY Bird Feeders

Watching the birds play in the garden is one of the many joys gardeners get to experience. When you feed them they will come.

Today I am going to give you some easy DIY ideas for bird feeders. The one I enjoy most is the pine cone bird feeder. It is very easy and more than likely you can find everything you will need without going to the store.

you will need:

1. pine cone

2. strong string (fishing line)

3. peanut butter

4. bird seed

First go on a nature walk and find your pine cones.

Next you want to attach the cone to the string. Make the string long enough to attach the bird feeder to a tree branch.

Then you will need to spread a thick amount of peanut butter all over the pine cone. You need enough to make the birdseed stick.

Finally you are ready to hand your bird feeder and watch them come and eat. Once the seed is all gone you will need to add more peanut butter before rolling it in the fresh birdseed.


Check out Mister Landscapers pintrest page for more great birdfeeder pins.

Recycled Garden Container

Have you ever stopped in the middle of throwing out a used up container of coffee and said, "Do I need this for anything?"

The answer today is YES.

Used metal or plastic coffee containers are great for planting your flowers in!

Don't panic about the fact that it says Folgers all over it. You can use old coffee cans and other cans to make some really cute garden containers!

The great thing about making your own container is that you give it the exact color and style you are looking for.

I myself have gone shopping to try and find some cute flower pots to place on my porch. In my experience the colors were plain and the prices were high! 

Don't forget to check out the Mister Landscaper pintrest page for more great DIY garden ideas!

If you would like to share your flower pots with us, we would love to see them on our Mister Landscaper Facebook page.