Search
RSS

Blog posts tagged with '#garden'

DIY Fairy Garden

Are you looking for something new to do with the kids or grandkids?

Want to get them outdoors and away from the technology?      

Here is an adorable craft to decorate the garden with the kids help!


What you will need:

  1.        Large Flower pot
  2.        Soil
  3.        Your choice of plants/ flowers
  4.        Twigs of several sizes
  5.        Plastic Cup or Bottle
  6.        Decorative Rocks
  7.        Hot glue gun
  8.        Twine


Step 1: Take your twigs and create some fairy furniture! 

Step 2: Take your plastic cup or bottle and glue your decorative rocks on to create a fairy home.

Step 4: Set your decorations and home aside and fill your flower pot with soil. (You want it to be as full as possible without overflowing.) Add your plants. (For our fairy garden that we are keeping indoors we chose to use fake moss and plastic flowers.)

Step 5: Add your fairy decorations to the flower pot! 

Enjoy this fun project!

Happy Gardening!


Images curtesy of Pinterest. 

Butterfly Feeder

 Are you missing the butterflies in your garden?

With this easy DIY craft you will soon be able to enjoy watching butterflies flutter from flower to flower.

You will need:

1. Mason jar

2. lid

3. small sponge

4. strong string

5. sauce pan

6. sugar

7. bright craft paint

8. garden stickers

9. hammer

10. 1 nail

You will want to start by tapping a small hole through the top of your mason jar lid. Next you will cut off a piece of the kitchen sponge and wedge it into the hole. This is where your butterfly will feed.  Next you will want to test your jar to make sure the liquid does not leak out. For now you can add water and turn the jar upside down to make sure it does not leak. Next you can add the string  that your feeder will hang from. You will need 1 long piece about 6  feet long. this will wrap around your jar near the lid as well as secure the other 2 pieces that will be used to support the sides of the feeder as it sits upside down. Tie the 6 foot string around the ring of the jar so you have an even amount on both sides.

Make sure it is nice and tight. Now you are going to tie 1 end of the 2 foot string to one side of the string wrapped around the jar. Next you are going to tie the opposite end of the 2 foot string to the other side of the jar. This will make a loop over your feeder. Next you want to do the same thing with the other 2 foot string. This time you are going to secure it to the opposite side of where the other 2 foot strings are attached. When you are done you should have 2 secure loops that support the jar evenly on all 4 sides. Now you will need to decorate

your jar so that it will attract the butterflies as well as humming birds. You will want to use bright colors and flower stickers for this.  Finally you will need to make the butterfly food. boil 4 cups water to 1 tablespoon sugar on the stove until sugar is dissolved. Don't use too much sugar it can hurt the butterfly.

Allow time to cool and then add the food to the jar. Secure the lid and hang about 3-4 feet above flowers so the butterflies can flind it. Now its time to sit back and enjoy your new garden friends.


Epsom Salt for The Garden

My upper back was extremely achy this week. I decided to get a massage. What a GREAT idea! I felt a lot better. The massage therapist suggested I go home and take a bath in Epsom Salt. She informed me that it helps take the toxins out of your body. I took her advice and soaked for 20 min. I felt even better and I did not notice the tenderness she warned me about following a deep tissue massage.

I decided to do a little digging and found that Epsom salt is good for lots of things including our GARDEN! Epsom salt Deters pest away, grows more flowers and helps your garden grow bigger than ever before.

To make your homemade fertilizer for the garden Dissolve 1 Tbs Epson salt in 1 gallon of water. Water your plants with this solution once a month. It works for house plants as well.

Epsom salt is not salt. It is a mineral that most soil is lacking. Enjoy watching your garden thrive! 

Garden Signs


Are you looking for a way to spice up your garden this summer? What about creating your own personal sign. It can be very simple and does not have to cost a lot. I found almost everything I needed in my barn.

If you have some old 2x4s, paint, nails and a hammer you are set. Now depending on what you decide to paint you may want some letter stencilers or a nicer tint of paint than what you have in the barn.

If you need some ideas check out a garden magazine find something you like and put your personal touch on it. Maybe you can stenciled your last name on one of the 2x4s and then add a flower or two.

The options are endless. If you don't like how it turns out let that paint dry and try something new later. 


Don't Lose It Use It!

It's that time of year again where you put on the garden gloves and start planting. It's so exciting sometimes you can forget what you just put in the ground.

This could leave you guessing all summer long. No worries. I have found the solution! It's an easy DIY craft that will take all the guessing out of gardening.

There are many easy ways to mark your seeds! You can keep it simple or get creative. My favorite is using old tea spoons with a picture of what you planted glued to the spoon.

The options are endless. For this one you will need


Materials Needed:

outdoor Mod Podge

Permanente markers

heave construction paper

ice tea spoons (check thrift stores or ebay)

acrylic spray coating

scissors


For this DIY craft you might want to ask the kids to help with coloring a small picture of the vegetable you are going to plant using the permanent markers. Make sure to cut out the paper the size of the spoon before you color the picture. This way you know it will fit on the spoon.

You will also want to put a small cut on one side of your circle to help it lay flat  on the spoon. Next put the outdoor Mod Podge on the back of your picture with a paint brush or Q-tip.

Then stick the picture to the inside of the spoon and press it down till you get it just right. This might take a minute.

Once the picture is in place cover the top of the picture with the outdoor Mod Podge. Give it time to dry. This will take about 20 minutes.

Next you want to seal it with the Acrylic spray. This will keep it safe from the rain and sprinklers. Now you are ready to start planting.

Remember don't lose it Use it. :)

Check Out These Other Great Ideas!

Check out our Pintrest page for more great DIY garden ideas!

Love That Stump

 Do you have an old stump in your yard that is an eye sore? 

Before digging it out and leaving a large hole in your yard take a look at some of these creative ideas.

1. Use that old stump to create a beautiful flower display! 


2. Decorate the stump to be a mini home. Get creative and have it match your home.


3. Find some more logs to place around the stump and turn it into a table with stump seating.


The ideas are endless. Check out Mister Landscapers pintrest page for more great ideas from other pintrest friends.


Fall Flowers


The fall season is on its way. It's time to start thinking about your fall flowers.

There are many great colors to choose from. Some of the most popular flowers are:


1. Aster

2. Toad Lily

3. Goldenrod

4. Russian Sage

5. Sedum


These are some of the most popular ones although there are many more to pick from.

Your next adventure after picking out what flowers you want in your garden would is to decide how to plant them.

Enjoy your fall flower selection. 


If you want to see more great fall flowers you can search google images for "fall garden flowers"

www.misterlandscaper.com


Fall Gardens

The fall season is among us. It's time to start planning for your next planting season. I don't know about you but I have a hard time deciding what to plant for the up coming season. I like to search on-line to get good ideas. I also thing about the holidays. "what will I need for the up coming holidays?"

I have found that making a plan and creating a list works great for me.

If you google images of fall gardens in your state you will see many neat ideas.


Gardens around the United States

 There are many beautiful gardens to visit all around the United States.

If you are looking for a beautiful place to go on vacation why not visit a few?

There are many web sites you can visit to plan your adventure. I linked a few I liked.


BBC Travel

http://www.bbc.com/travel/slideshow/20130515-ten-north-american-gardens-worth-travelling-for 

This site has a list of the top ten North American gardens worth traveling.


Save Water, Time, and Money

The cost of water is on the rise!

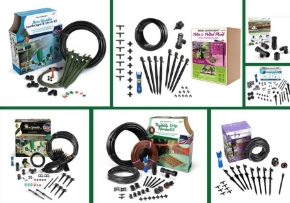
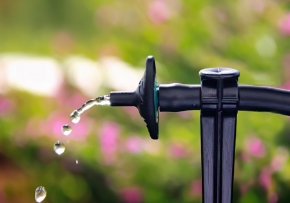
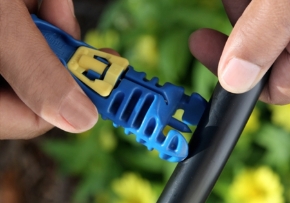
If you are looking for ways to save money, time and water then you need to check out Mister Landscaper's Quality DIY low-flow irrigation kits.

You can read about Mister Landscapers products on the Mister Landscaper web site, Facebook, twitter, and Pintrest.

If you join us on Facebook and Twitter you can talk to all our happy customers. Let them tell you how Mister Landscaper has helped them out.

We are a company that backs our products. If you have a question our support team is here to help. You can reach us directly or contact us on  Facebook and Twitter. We will respond.