Search
RSS

Blog posts tagged with '#inthegarden'

Baking Soda In The Garden

Dear garden friends,

Baking Soda is our friend in the garden as well as in the kitchen. Baking Soda can be used in the garden for many different reasons. If you want to keep the pest away from your plants, rejuvenate your roes bush, sweeten your tomatoes, and more. Next time you are making your grocery list add another box of Baking Soda for your garden. 

Baking Soda

How to keep the pest away:

If you are having a problem with pest you can sprinkel Baking Soda around the garden. Don't sprinkle it directly on your plants. This will help discourage rabbits, roaches, silverfish ants and more.


How to rejuvinate your roses:

1 tsp. Baking Soda

1/2 tsp. clear ammonia

1 tsp. Epsom Salt

1 gallon water

(This mixture will treat about 4 rose bushes that need a pick me up.)

Spray


How to make sweeter tomatos:

Sprinkel Baking Soda near your established plants to make a sweeter tomato.

Tomato

Check out Mister Landscaper Pintrest page for more great DIY garden ideas.


Happy Planting!


Composting

Is your garden looking like it ran out of fuel? Composting may be your solution. When you add composting to your garden it can restore your soil and give it that nutrience needed to help your garden thrive!


What about the smell?

Some people worry that having a compost pile means you have to deal with the smell of rotting food. There is an easy solution to this initial worry. By adding a layer of dirt to the top of your compost it will help reduce any odor. 

How do I make a compost pile?

You can make your own compost pile or you can buy one. I have seen them for as cheap as $20.00 on Amazon. It just depends on the size you want and how much you want to spend.


What can I add to my compost pile?

  1. fruit and vegtables
  2. coffee ground
  3. natural tea bag
  4. loose leaf tea
  5. coconut milk
  6. napkins
  7. pizza box (will need to rip up)
  8. papper bag
  9. tomato sauce
  10. cereal box
  11. nut shells
  12. seaweed
  13. burnt popcorn
  14. old oatmeal
  15. fruit pits
  16. toothpicks
  17. paper cups
  18. lint
  19. bills
  20. sticky notes

Do not compost the following:

  1. cooking oil
  2. diseased plants
  3. human or animal feces
  4. meat
  5. milk
  6. rice

 You can use google to find list of additional items that you can or can not compost.


Conserve Water This Summer

Are you looking for ways to conserve water?

The hot summer months are near.

Warm weather usually is a recipe for more water usage.

People are washing cars, filling pools, watering gardens and more.


Conserving water has been best practice in most regions.


Conserving water can not only reduce pollution in lakes and streems,

it can also save you money on your utility bill.

Below you will find a few ways to help you conserve water.

  1. Put a layer of multch around trees and plants.

    • This slows evaporation of moisture.
  2. Water your garden only when it needs it.

    • Mister Landscaper's DIY Low-Flow Irrigation  for the garden and potted plants can help with this. 
    • Mister Landscaper also sells a timer so you can control when your garden is watered while you are away.
  1. don't run the hose while washing your car.

  2. Water your garden in the morning. 
    • This reduces evaporation and prevents fungus from growing.
  3. Use a broom not a hose to clean the driveway.

  4. Check for leaks in hoses and pipes.

    • A leaking faucet can loss 20 gallons of water a day.
  5. Use a water meter to check for hidden leaks.

    • Read the meeter two hours before and after water usage.
  6. Put water boosters in the back of your toilet.

    • Use a small bottle with rocks in it to save 10 or more gallons a day. Keep bottle away from operating tools.


Straw Bale Garden

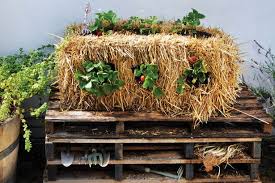
Have you ever wondered if soil is the only way to grow a garden? Believe it or not you have other options. Today I am going to share with you how to create your own Straw Bale Garden.


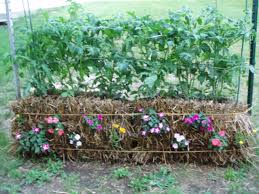
Straw Bail Garden's are  great for planting in small areas or areas that don't  have soil. You will need to prep your Straw Bale Garden. The good news is that it will only take 12-14 days to prepare.

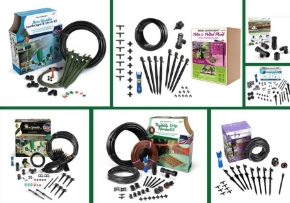
The great news is that if you use Mister Landscaper's DIY Irrigation you won't have to worry about most of the prep work. The first move is to purchase your straw bales and liquid fertilizer, with nitrogen to to increase the decomposition process. The total process takes 10-12 days. 

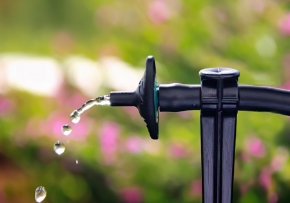
Before you set up your Mister Landscaper DIY Irrigation Kit you want to make sure your straw bale is on it's side with the cut side up. The cut side of the straw bale will act like little straws. This allows the water and fertilizer to soak down into the bale.  Now you are ready to set up Mister Landscaper's DIY Low-Flow Irrigation Kit. This only takes about 20 minutes or less. 

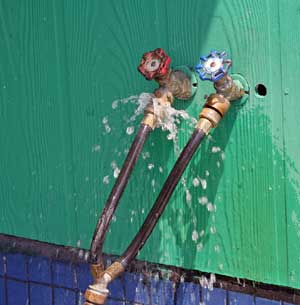
If you order  Mister Landscaper's Timer you can attach it to the end of your hose and you won't  have to water your bales for the next 3-4 days. You will want to set the timer to water often so that it remains damp for the entire three days. On the third day you will start using the liquid fertilizer. For the next 7-8 days you will want to use the liquid fertilizer. in addition to watering.

On day 12 you will want to return to just watering your bale. On the 12 day you will be able to stick your hand down into the bale and feel the heat from the decomposing process.

You don't want to plant until that tempature reaches the same temperature as the outside air.

If you plant too soon you will cook your plants. On the TH day you will need to start using the liquid fertilizer. Once the temparture reaches the air temperature it's time to plant.

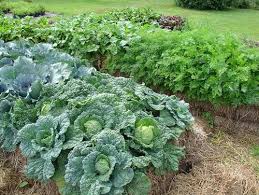
You can plant anything in your Straw Bale Garden although some plants can pose a challenge. For example, corn and tomatoes grow tall and may cause your bale to tip.

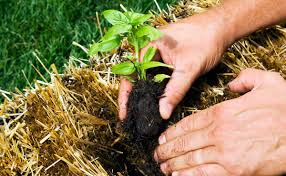
Potatoes grow down and it may be difficult to retrieve them. To plant you will plant the same way you plant in the soil. You want to dig out a hole as deep as your plants root.

Be sure to space your plants according to the directions on the plant. Add some soil around the plant to stabiles it then place the straw you removed from the hole on top of that..


Finally you are ready to sit back and watch your plants grow. Don't forget to fertilize the plants once every week or two. Mister Landscaper's DIY Irrigation will take care of the watering.


Rock Garden Markers

Have you ever said, "What's that sprouting up in my garden?"  

I know I have a time or two.

You won't have to wonder once you finish with your Rock Markers. This is a cute and easy DIY craft that you will want to share with all your garden friends. You are going to want to start by collecting a dozen or so medium size smooth rocks. If you cant find the smooth ones any rock big enough to paint and easily pick up would do.


The one to the left is a nice rock but it is too big for this garden craft! The one to the right is the perfect size for our Rock Garden Markers. Once you have found your just right rocks you will want to wash them off in a hot bucket of soapy water.

You might just want to drop the rocks in and let them soak for a few minutes. Be sure to wash all the dirt off. If you don't your paint may come off in that area. 

Now it's time to dry off. A large towel would work best. Wrap your rocks up and pat pat pat! Allow them to dry over night to be sure no dampness remains.

Let the fun begin! Go to your nearest craft store and pick out some fun craft paint that works for outdoor crafts.

You may want to think about what you want on your rocks before you pick out your colors. Once you have your design in place pick out your paint and paint brush. You will want to spread out newspaper on your surface before you begin.

This craft can get a little messy depending on the age group. :)

Ones your art is finished you may want to cover it with a gloss finish. This can be found at your craft store or Lows.

Happy Painting!


How to Grow Garlic


Did you know that there are over 450 different strands of garlic? I was excited when I heard the news! It made me start to wonder, "What garlic am I getting in the little jar at my local super market,

Maybe I am missing out on something better?". With a little more research I found that you can go online and order some of the different types of  garlic bulbs and plant them in your own back yard.

garlic is not complicated to plant  and the time to plant is November. After watching a YouTube video I learned how easy planting garlic can be. The video I watched was planting garlic in a raised garden bed.

I learned that it's best to use string to section off your garden into 1 square foot sections. It looks like a over sized checker board. Next you want to peel open the garlic bulb and separate each clove.

You want each clove to be planted about 5-6  inches apart. You will have 4 cloves in each square foot.  The clove will have a little green stem pointing out of one end. This is the side you want  to plant up facing the sun.

The bulbs need to be planted under 2  inches of soil. This will help protect the bulbs during the winter months.

If you live in a very cold climate area  you will want to place some mulch on top of your garlic bed prior to the first hard freeze to  help protect them. By next spring -summer you will be enjoying fresh garlic out of your garden. The greatest part is that you won' have to go to the supermarket to make your next garlic dish.


Egg Shell Pest Control

I love to bake with my two young children. My daughters favorite thing to do is crack the eggs. She started at 1 1/2 years old. You can only imagine the amount of egg shells I had to dig out and throw away.

She is a lot better at cracking the eggs now that she is almost four.  I was reading about new garden ideas posted on pintrest and I came across a few pages that talked about saving egg shells to use in the garden. This caught my eye.

As I read I found out that you can use egg shells to keep pest out of your garden. Some people let them dry out and crush them into a fine sand like consistency.

Next they place them in plastic containers to be sprinkled around their plants as needed. Others just dig around their plants and throw the cracked egg shells in the hole. The egg shells are used to keep Beatles, fleas, slugs, snails and other pest away. 

I love to use organic any chance I get. Especially when it is something my family will be eating.  If you are looking for more more tips on what to do with your egg shells go to Mister Landscapers pintrest page and punch in growing. You will be very surprised to see how many different ways you can use your egg shells in the garden and around the house.


Growing Organic Tomatoes


Grow Tomatoes Organically
 
1. You will need a place with at least 5 hours of sun.
 
2. Work up the soil and add compost or rotten manure.
 
3. Tomatoes love to eat! Add about ½ dozen egg shells to the soil as well (this adds calcium to help prevent rot)
 
4. You can buy or grow you tomato plants. When picking your plants don’t buy a big plant that is growing in a small container. Also avoid tall tomato plants. These plants tend to be root bound.
 
5. Tomatoes don’t like frost! Wait till the frost season is over.
 
6. To plant tomatoes dig a deep hole or long trench. Loosen roots as you remove the seedling from the pot.
 
7. Plant the tomato plant deep. You want about 3-4 inches of the plant above ground.
 
8. You will want to put up a trellis to support the tomato plants. As the plant grows you can tie it to the trellis with a soft cloth.
 
9. If you don’t want to bother with a trellis you can let them spread out on the ground. Just be sure to give them lots of room so they don’t rot.
 
10. Tomatoes need water! They need about an inch or water a week. Don’t give them too much water because this can cause rot. If you are looking for a great way to water your tomatoes check out Mister Landscapers DIY low-flow Drip irrigation kits. They work great when you want to save water and give your plants the perfect amount. Check them out at www.misterlandscaper.com
 
11. Don’t let the weeds tale over
 
12. Enjoy your home grown tomatoes!


Fall Gardens

The fall season is among us. It's time to start planning for your next planting season. I don't know about you but I have a hard time deciding what to plant for the up coming season. I like to search on-line to get good ideas. I also thing about the holidays. "what will I need for the up coming holidays?"

I have found that making a plan and creating a list works great for me.

If you google images of fall gardens in your state you will see many neat ideas.


Gardens around the United States

 There are many beautiful gardens to visit all around the United States.

If you are looking for a beautiful place to go on vacation why not visit a few?

There are many web sites you can visit to plan your adventure. I linked a few I liked.


BBC Travel

http://www.bbc.com/travel/slideshow/20130515-ten-north-american-gardens-worth-travelling-for 

This site has a list of the top ten North American gardens worth traveling.