


Water conservation has become an important part of maintaining healthy landscapes, gardens, and outdoor spaces. Traditional sprinklers often apply more water than plants can absorb, leading to runoff, evaporation, and uneven watering. Micro spray and mist irrigation systems offer a more controlled approach by delivering water directly where it is needed.
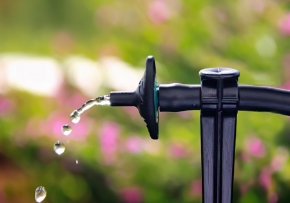
These low-volume irrigation systems are designed to provide consistent moisture while reducing unnecessary water use. Micro spray systems can provide targeted coverage for gardens, shrubs, flower beds, trees, groundcovers, and other smaller planting areas with a gentle spray pattern that helps support efficient watering.
Why Traditional Sprinklers Waste Water
Many homeowners rely on conventional sprinkler systems without realizing how much water may be lost during irrigation. Overspray, wind drift, and runoff can all contribute to wasted water. Common causes of water waste include:
- Water spraying onto sidewalks, driveways, and patios
- High-pressure systems creating runoff before soil absorption
- Uneven watering patterns that oversaturate some areas
- Evaporation during hot or windy conditions
- Watering schedules that exceed plant needs
Micro spray and mist systems help reduce these issues by operating at lower pressure and distributing water more precisely.
How Micro Spray Systems Improve Water Efficiency
Micro spray irrigation systems are designed to apply water slowly and evenly across planting areas. Instead of overwatering broad planting areas, they focus on targeted coverage for shrubs, flower beds, trees, and gardens. Benefits of micro spray systems include:
- Reduced runoff due to lower water flow
- More even soil moisture distribution
- Better control over watering zones
- Lower evaporation compared to high-pressure sprinklers
- Adjustable spray patterns for different landscape layouts
Micro spray systems can also be customized with different nozzles and spray heads to match plant spacing and watering requirements. Many systems include adjustable flow controls that allow users to fine-tune coverage.
The Role of Mist Systems in Conserving Water
Mist systems use extremely fine droplets to provide moisture with minimal water usage. These systems are commonly used for delicate plants, greenhouses, patios, and areas that benefit from humidity control. Mist systems can help reduce water waste by:
- Delivering lightweight moisture directly to plants
- Reducing excessive pooling and soil erosion
- Helping plants retain moisture during hot weather
- Supporting humidity-sensitive plants
- Cooling outdoor spaces with less water than traditional sprays
Because mist systems release smaller droplets, they can create efficient coverage while using lower water volumes. This makes them useful for residential gardens, planting beds, patios, and specialized gardening applications.
Tips for Getting the Most from a Micro Spray Irrigation System
Installing a micro spray or mist system is only part of the equation. Proper setup and maintenance can further improve water conservation. Helpful ways to maximize efficiency include:
- Watering early in the morning to reduce evaporation
- Inspecting spray heads regularly for clogs or damage
- Using pressure regulators to maintain a consistent flow
- Positioning spray heads close to plant root zones
- Adjusting watering schedules based on seasonal conditions
- Grouping plants with similar watering needs together
- Using timers to avoid overwatering
Many micro irrigation kits also allow homeowners to expand or modify their systems as landscaping needs change.
Choosing the Right Areas for Micro Spray and Mist Irrigation
Not every garden or planting area requires the same irrigation method. Micro spray and mist systems work especially well in areas where precision watering is important. Ideal applications include:
- Flower beds
- Vegetable gardens
- Shrub borders
- Groundcovers
- Potted plants
- Greenhouses
- Newly planted landscaping
- Patio cooling areas
Micro spray systems can also be useful in landscapes with slopes or clay-heavy soil because slower watering helps reduce runoff and improves absorption.
How Mister Landscaper Supports Efficient Watering Solutions
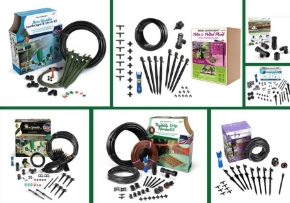
At Mister Landscaper, we offer a variety of products designed to help homeowners and gardeners reduce water waste while maintaining healthy landscapes. Our product lineup includes micro spray sprinkler kits and irrigation system products for residential gardens, flower beds, shrubs, trees, and other smaller planting areas. Some of our available solutions include:
- Micro spray irrigation kits for landscapes and shrub beds
- Adjustable micro sprays with multiple spray patterns
- Stake assemblies for targeted watering
- Mist watering components for delicate plants
- Pressure regulators and timers for controlled irrigation
- Expandable systems for customized garden and planting bed layouts
We also provide all-in-one kits that can connect directly to outdoor faucets and cover a wide range of garden sizes. Our systems are designed for low-volume irrigation, helping homeowners apply water more efficiently throughout their gardens and planting areas. We provide convenient ordering options for our products right on our website. Feel free to contact us with any questions!


